What Is the Style of Art of Various Cakes Wayne Thiebaud
Please Note: All images seen beneath are of my students artwork only. These photos/lessons are not posted in any particular lodge regarding the flow of my curriculum.
Victorian Architecture
fourth graders did such a beautiful job creating these Victorian houses!!
Students learned nigh Victorian Compages and learned about some of the common characteristics establish within the Victorian architectural style , (i.due east., gables, turrets, towers, bay windows, fish-scale shingles, dentil details, brick details, decorative "gingerbread" details etc.) and were challenged to envision and create a drawing of their own Victorian style house that included some of these elements. Students had handouts to refer to of various victorian style homes, and stride-past-footstep cartoon sheets to use as reference while they worked.
Students used a ruler to depict any straight lines within their work. I as well demonstrated how to describe stairs that looked three-dimensional, bay windows, fish-scale shingles, stone details, and brick.
Once finished, students carefully colored in their unique Victorian homes using amonochromatic color scheme (a color scheme of lights and darks using but i colour) with colored pencils.
I demonstrated to students iii ways to create a monochromatic look. One way was to create tints and shades of their chosen colour past crosshatching white (pressing hard) over another color until the desired tint was achieved. Here students also learned how to create a shade, past crosshatching blackness over their called color (pressing lightly) until the desired shade was achieved.
The second way to create a monochromatic look is by creating various shades of their color simply by the amount of pressure used when coloring. Pressing super low-cal will create the lightest shade, and every bit you press harder, the color will appear darker.
The third way is by selecting diverse shades of their chosen color from the colored pencil bin (e.1000., mint green, lime greenish, dark dark-green etc.)
Details similar brick chimneys, stone walls, roofs, and curtains in windows could be colored in with other colors (e.thousand., brickwork for chimneys could be colored in with reds, browns, pinks; stone walls could exist colored in with greys, tans, browns etc., defunction could be whatever color).
Students did such an incredible job creating these drawings! They worked very difficult and I'm very impressed!
Learning Goals:
– Expands knowledge of colour and demonstrates an understanding of a monochromatic colour scheme
– Gains an understanding of value, and learns how to create tints and shades of a color
– Be able to identify characteristics of Victorian compages and create them in their artwork
-Understands and applies the Elements of Art (Line, Shape, Color, Space, Value, and Texture) in their artwork
-Connection to math and history


I love how each one is so unique!!


The Victorian Houses below are from lessons where students could color their houses with any colors they wanted, rather than monochromatically.


TO VIEW More than DETAILS ON THIS LESSON, Encounter STUDENTS CREATING THEIR HOUSES, AND VIEW SOME OF MY POWERPOINT, CLICK ON "SEARCH" Then Blazon IN "VICTORIAN HOUSES- fourth Course" TO GO TO MY BLOG Post ON THIS LESSON.
Art EDUCATORS:FREE Powerpoint lesson and hand-made step-by-step drawing sheets are bachelor to download under the page "Complimentary printable handouts" in the main menu!!!! Or Click Here to go directly to my TpT folio (Teachers Pay Teachers) to access them!
Printmaking~ Victorian Firm Prints
After students finished coloring in their Victorian houses they used their previous knowledge on printing (from their 3rd grade complementary fauna prints) and created aimpress of their Victorian house.
To practice this, students taped a photocopied image of their drawing (I had their drawings photocopied once their drawing was complete in pencil) onto a canvass of styrofoam.
Students traced over all the lines within their photocopied epitome with a boring pencil, pressing into the paper and styrofoam in order to transfer the drawing of their house. To ensure a articulate print, students then took off the photocopied sheet and went over their lines in the styrofoam once more with pencil. This way, the grooves from copying their lines would be deeper, to create a cleaner print.
On mean solar day 2, students then colored their houses in on the styrofoam using markers. Students could color in their house whatever way they wanted except all windows were colored in yellowish or black to make it expect like the lights were either on or off.
After coloring their styrofoam sheets, students wet a piece of 9 x12″ 80# drawing paper using a spray bottle, (spraying 7 times -ii at the top corners, 2 in the middle, and so two on the bottom corners, then one more in the middle) then spread the water evenly using a clammy sponge. Here I already have pre-dampened sponges prepare for kids to use. They then pressed the styrofoam sheet, face down (color side down), over the moisture paper. The goal with this stride is to make sure they kids don't move the styrofoam in one case it comes in contact with the wet paper, or else information technology creates a blurry print. They need to go on 1 manus holding information technology down at all times while the other hand presses in other areas. A brayer is likewise used and rolled over the styrofoam to assistance really press into all areas. I demo all these steps beforehand.
The water from the wet paper lifts the marking off from the styrofoam. After pressing over the unabridged surface carefully without moving it, the styrofoam canvas is lifted off and their image transfers to the wet paper.
Students repeated the coloring and printing process, creating 3 prints to obtain the clearest print possible.
Learning Goals:
– Furthers agreement and skills on printmaking


WAYNE THIEBAUD INSPIRED MIXED-MEDIA DONUTS!
4th Graders did such an awesome task creating these super fun donuts inspired past Wayne Thiebaud!
This was a fun three solar day lesson. On the get-go day, students were introduced toWayne Thiebaud and viewed a slideshow of his artwork. Nosotros discussed how his paintings of cakes, donuts and other sweetness treats looked so existent, and how the texture of his thick layers of pigment for frosting looked like real frosting!
To create their mixed-media donuts, students folded a piece of medium weight nine×12″ tagboard in one-half to create a pucker, opened it upwardly, and then colored over the entire sail with various colored oil pastels. The top department was colored in with one design and the lesser department using other colors for a 2nd pattern.
On the second day, students painted over their oil pastel covered paper using two colors of their selection with liquid tempera, one color on the top and 1 color on the bottom section.
Once one section was painted, they usedtexture combs to run over the painted area while even so moisture to create diverse lines inside the paint. I fabricated the texture combs from recycled plastic gift cards by cutting notches along ane side.
They so painted the bottom one-half and ran the texture rummage forth that section likewise.
On the final solar day of the lesson, we talked nearlyperspective and I demonstrated how to draw a donut (non viewed from above) but from eye-level, resting on a table in front of you. To practise this, students drew an oval with a smaller oval near the top of the donut. Frosting was drawn dripping around the top of it and into the hole of the donut as well. They colored in their donuts using markers or colored pencils and so the donut was cut out, glued on top of one-half a doilie, and then used puffy paint (students LOVED this step!) on their donut to create sprinkles (creating more texture!)
A Large thanks to Cassie Stephens (https://cassiestephens.blogspot.com/) for sharing this awesome idea!!
Kids had a blast creating them, and I LOVE how they turned out!!
Learning Goals:
-Acquire about the life and artwork of Wayne Thiebaud and tin identify his work
-Demonstrate an understanding on how to create perspective in artwork
-Tin can ascertain texture, and demonstrate an agreement on how to create texture in artwork


Click Here TO VIEW MY ART VIDEO TUTORIAL ON THE MIXED-MEDIA DONUT LESSON!
Enlarged Bloom Drawings Inspired by Georgia O'Keeffe
Students learned well-nigh the artist Georgia O'Keeffe , and viewed examples of her blossom paintings. We talked almost the scale (size)of her work and that her flower paintings were so large considering she thought flowers were incredibly beautiful and wanted people to notice them! She loved to create close-upwards paintings of flowers. Looking at her flower paintings is like looking at a flower with a magnifying glass!
Nosotros as well reviewed what abstract artwork is (artwork that focuses on mainly lines, shapes and colors ), which is how Georgia O'Keeffe depicted a lot of her flowers in her work. She focused on just small sections of a blossom –instead of the entire blossom in a lot of her piece of work, therefore abstracting the prototype. Not all of her flower paintings are abstruse, simply many are.
DAY 1:
I showed students multiple examples of her blossom paintings through a ability betoken presentation and discussed her piece of work and background.
After demonstrating how to focus in on i surface area of a flower and block out the rest (students could cull their own printed bloom image to observe ) by using a viewfinder, (using a blackness foursquare slice of construction paper with a small (about 2×2″ square) cut out in the eye). Students had to select an area of their bloom and so it's petals touched or ran off at to the lowest degree three sides of their viewfinder (run across pics below).
Students then practiced drawing and enlarging small sections of their chosen flowers, in their sketchbooks. They did this iii times, each bloom drawing on a dissimilar page in their sketchbook. They had a choice of choosing 3 different blossom images OR drawing from one flower image but focusing in on different areas of the flower each time.
DAYS 2-3:
Students selected 1 photo of a flower for their terminal drawing. They enlarged a section of their flower on 12×12" paper, making certain that their drawing of their called flower ran off or touchedat least 3 of the iv sides of their paper, while considering the composition (how and where things are placed on the folio).
Once drawn, students colored in using oil pastels . Students had a choice of coloring in their flower whatever colors they wanted!! In previous years I had students color in their flowers trying to best match their flowers colors in the photo. The only dominion with color I had was, was to switch to a unlike color when their was a transition of color in their flower photo. Too, If their was a scrap of background showing in their limerick, (some students selected areas of their blossom that simply showed the flower– without whatever background) they needed to colour it in with any i chosen color for dissimilarity .
DAY 4:
For a terminal stride, students created a fleck of depthwithin their flower by adding shadows effectually the edges of their flowers petals with black oil pastel, then blending with their finger. Calculation black for shading with oil pastels is a pretty catchy step, and tin be a fleck challenging, simply I remember students did a wonderful job adding that element to their artwork!!
I absolutely Beloved these flowers!!
Learning Goals:
– Learn most the life and artwork of painter Georgia O'Keeffe
– Can ascertain abstract and recognize abstruse artwork
– Strengthen observational cartoon skills
-Can create depth inside artwork
– Acquire what a viewfinder is and how artists use them to help narrow their field of vision


Aren't these gorgeous???!!!! I Honey them!

COLLABORATIVE ENLARGED Bloom Drawing- Inspired by Georgia O'Keeffe
(photo of students artwork below all pieced together of Georgia O'Keeffe'southward "Ruby Poppy VI")
I am And then impressed with the attending to detail students gave to each of their drawings!! Isn't it Amazing??!

(Below prototype is of the print out copy with grid pre-drawn before cutting into squares for students )

(Beneath is a photo of her painting "Red Poppy 6" in its entirety)

(photo of students artwork below all pieced together of Georgia O'Keeffe'southward "Pinkish Tulip, 1926")

(Below is Georgia O'Keefe's painting that I cropped earlier drawing the grid)

(Beneath is her painting "Pink Tulip, 1926" in its entirety)

This was a super fun i day lesson (1 xl infinitesimal art class) on a continuation on learning almost Georgia O'Keeffe.
Each educatee in ane 4th class course got a tiny 1 and one/four" section of a photocopied image of Georgia O'Keeffe's "Red Poppy 6" and in another 4th grade course a one and 1/4″ department of Georgia O'Keefe's photocopied image of her painting "Pink Tulip, 1926" to copy on a half dozen" square of eighty# drawing paper.
Each tiny photograph had a number written on the dorsum besides as the word "Top" along the superlative edge, and so students knew how to view their prototype earlier cartoon on their 6×6″ newspaper.
Students wrote their respective number on the dorsum of their half dozen″ paper every bit well as the word "superlative" along the peak edge. This would make assembling the flower a whole lot easier for me later on on!
They and so drew the lines and shapes first with pencil and so colored in trying to all-time match the colors of the print out.
Once complete, I brought them all home and assembled together on big white newspaper with hot glue.
These both measure out out to be xxx" x 36" full.
I think students did a FANTASTIC job creating these beautiful flowers together every bit a class!! What do you think?
Learning Goals:
-Tin can define what collaborative art is
-Can define abstruse fine art and create an abstract cartoon
-Tin can blend oil pastels together to create various colors
-Larn near Georgia O'Keeffe and her artwork and tin can place her flower paintings
DANDELION PUFFS
Additional artwork below!!

This easy and fun 2 24-hour interval fine art lesson focused on the elements of fine art; Line, Shape, Color and Value. Students too learned nearly a new watercolor resist technique using condom cement before painting!
Special shout out to artroombritt.blogspot.com for this lesson idea!
DAY 1
Students observed various drawings of dandelions and reviewed the meaning of composition in artwork, (composition= the way things are laid out or where things are drawn/placed on paper).
Students drew three stems spaced apart a bit coming from one side of a sail of ix×12″ tagboard with pencil. They could be drawn coming from either side of the paper going towards the middle.
They drew a pocket-size circle at the tip of each stem for the dandelions eye and and so lightly drew a large circle effectually it to act equally a guideline to where their dandelion seed heads would be fatigued to, to create a full, fluffy dandelion puff.
Students drew 1 big dandelion and two smaller ones on either side of the large one. Then drew a variety of seed heads stemming out from the eye of each dandelion. I demonstrated diverse seed head tips for drawing before students drew on their own papers. I likewise offered a handout to refer to and notice, if they wanted while drawing.
Then in one case all three were drawn, they added drifting seed heads blowing abroad from the dandelion puffs in the wind. These drifting seed heads were drawn traveling in different directions (just like in real life) and not but adds interest, but creates a nicelimerick with the three dandelions along the opposite side.
And so students went over their stems lines and dandelion puffs lines and globe-trotting seed heads with a black sharpie. After using sharpie they erased any pencil lines that remained.


One time that was done- after grade, (when students were no longer in my art room), I brushed on a thick layer of condom cement where each circular dandelion puff would be, likewise as on the globe-trotting seed heads. The safety cement was a bit stinky and isn't healthy to exhale in, so I worked adjacent to an open window. This is why I applied the rubber cement and not the students.
The safe cement was left to dry until the next course. (BTW- This doesn't take up much rubber cement at all- I used virtually three small jars for iv classes (roughly 24 students per class).
DAY ii
Earlier applying pigment to our drawings, wereviewedwarm and cool colors.
I had ice cube trays filled with liquid watercolors (one end withwarm colors (warm colors=reds, pinks, oranges and yellows) and the other stop withcool colors (absurd colors= blues, greens and purples).
We also reviewed thewet-on-moisture watercolor technique before painting. After demonstrating, students practical h2o merely to 1/2 their newspaper quickly with a watercolor brush. THEN applied dabs of either just warm colored paint OR simply absurd colored paint onto the wet areas using i colour at a time.
Students noticed how the pigment spread outward from where they dabbed piffling $.25 of paint over the watered downwards paper. The water helps spread the paint and information technology as well changes thevalue of the color making the color lighter and less vibrant (value= the lightness or darkness of a color).
And then once i 1/ii of their paper was painted, they dabbed the painted department with a newspaper towel while all the same wet, to help soften the colour and spread the paint even more.
And then painted the other one/2 of their paper with h2o simply and practical paint to that moisture area and then dabbed off with a paper towel.
Once paintings were dry, the rubber cement was rubbed off, revealing the white dandelion puffs!


LEARNING GOALS
Students can define/place warm and cool colors
Students can tin define composition, value, and wet-on-wet painting
Students larn about various watercolor resist techniques
Abstract Tint Paintings
Students learned nigh the paintersWassily Kandinsky, andPaul Klee,and viewed examples of theirabstractpaintings.
Students reviewed how abstract artwork focuses mainly onlines,shapes, andcolors with very fiddling, if any, recognizable shapes (e.one thousand, a bird, a moon, a house, a person etc.).
On day 1 of the lesson, students used rulers, various shaped tracers as well as freeform drawing to create their own abstract cartoon on grayness paper, overlapping some of their lines and shapes. One time drawn to their liking, students traced over all their lines with a thick black sharpie to create definition.
On days two and three, students learned what a tintwas and how to create tints with paint. Students chose ii colors plus white for their newspaper plate paint palette.
Students painted in some shapes with their ii tints, some shapes using the 2 colors without tinting, and some shapes white to create visual interest. Students had the option of leaving some shapes without paint, revealing only the greyness paper or to paint in all of their shapes.
On 24-hour interval iv of the lesson, students carefully went over all their black lines once again, using a black crayon, to ascertain and clean upwardly the edges. They and then filled out a reflection worksheet listing 2 things they like almost their artwork, and ane affair they would alter or do differently. It also had information virtually what they learned throughout the lesson: Wassily Kandinsky, abstract fine art, and how to create tints. They and so taped the reflection sheet to the back of their work.
The thing I love so much most this lesson is that information technology allows so much creative freedom. I honey how each one is and so unique! A big cheers to Thomas Elementary Art (http://thomaselementaryart.blogspot.com/) for such a fun lesson thought!!
Learning Goals:
– Students tin depict what a tint is and create tints within their artwork
– Tin can draw what abstract artwork is and create their own abstract cartoon
– Learn about the artists Wassily Kandinsky and Paul Klee and their artwork


RADIAL SYMMETRY PRINTMAKING

Read below to find out how nosotros created these, run across step-by-footstep pics and sentry my YouTube tutorial on this lesson!


Printmaking is one of my favorite things to teach in art. I love information technology because it ever has an chemical element of surprise with the results each fourth dimension. Getting all the "Ooooh'due south" and "Ahhh'south" later on printing is so fun and magical and is always fun to encounter!
fourth Graders used their previous knowledge onprintmaking from when they were in 3rd grade when creating their "Complementary Animal Prints". 3rd course students used markers to print… and this time, as 4th graders… used black tempera paint to print. We used liquid watercolors to create the background before printing a symmetrical radial design on pinnacle using black tempera paint.
I love how colorful they are and loved showing students a variation in printmaking. They did a fantastic job!
This lesson took 4 to 5 (40 infinitesimal) art classes to complete.
Solar day 1 – PAINTING THE RADIAL RAINBOW Design
On the first day of the lesson, we reviewedsymmetry(images that are the same on both sides)and students were introduced toradial blueprint(a design that tin can include any lines, shapes or colors that starts in the middle, and radiates outwards in a circular way). I explained we'd exist making a symmetrical radial rainbow painting.
After demonstrating, and reviewing the order of the rainbow, students then measured to locate the center of their newspaper, using a ruler and marked the 6″ spot with pencil. From the center out, they and so painted a radial rainbow blueprint on their 12×12″ tagboard with liquid watercolors.


Twenty-four hours 2 – DRAWING THE RADIAL DESIGN
Students drew curving lines (with some space between each line) on a half dozen″ foursquare piece of re-create paper that had been folded into a triangle, in pencil.

Then drew different lines and/or shapesbetweeneach curving line. Making sure not to depict also small or too detailed. Simple is best. They could be a pattern of lines and shapes, but didn't have to exist.


Then students opened the paper up, and traced over their pencil lines with a blackness sharpie.


Then students flipped upwards the blank bottom half over the top half that had been traced in sharpie like beneath.
The drawing can be seen through the newspaper (as shown on the picture to the right above). Then students traced over their lines with a pencil like below.

TIP: Identify a sheet of white paper underneath your work while tracing and then the lines can be seen more conspicuously. OR place the newspaper on a window to allow light to shine through the backside to see more conspicuously as you trace. OR- rather than using copy paper folded into a triangle, use tracing paper.
Once ALL the lines have been traced, So unfold, by taking the bottom one-half out similar below. You should be able to see the pencil part on summit, and the behind of the sharpie part below. Here you lot can now see the entire pattern is continuous on both halves of the paper.
From here, take the newspaper and record it to a 6″ square cutting piece of styrofoam ( the printing plate ). Use clear tape and simply tape it to the elevation in 2 areas and so the paper can open up and close like below. Don't worry well-nigh the tape covering your cartoon a bit.

Once the drawing is taped onto the printing plate, students started tracing over ALL the lines with a wearisome colored pencil. (The colored pencil lets you know where y'all accept traced since it leaves a colored line). Press firmly as y'all trace. This step transfers your drawing onto the printing plate.

It's a good thought to check to see if its transferring well plenty, so flip upward the taped down drawing to check how information technology's coming along. As long as you can see the lines indentations on your printing plate well plenty, you're skilful!


Continue tracing with a dull colored pencil until the unabridged design is traced.

Once that'southward done, students flipped over the newspaper they were tracing. Hither you should be able to see the drawing completely transferred onto the printing plate like below.

Adjacent, students traced over their indentations of their design on the styrofoam printing plate with a dull colored pencil. (Tracing again pressing firmly). This step is crucial and creates a overnice deep indentation which creates a articulate impress later on.If it's not pressed in twice (once with paper over the styrofoam, and over again a second time on just the styrofoam the overall print wouldn't be every bit clear when time to print.)

From here, students so colored in *some* of their shapes they created within their blueprint with colored pencil. Once again pressing firmly!Areas where it is colored in, will reveal more rainbow from the painting created.Students could fill in as much equally they wanted or equally niggling as they wanted. This step was the final pace earlier printing, so kids were very anxious to become printing! Teacher example on left, student example on right.
One time shapes were filled in, students flipped over the styrofoam printing plate, and drew an pointer with sharpie pointing to the corner where they started their drawing.
* Technically, to print a symmetrical radial pattern, the arrow could be drawn pointing in ANY one chosen corner, every bit long as it's in simply one corner. For a complete circle blueprint similar nosotros created, nosotros drew the arrow in the corner where nosotros originally started the curving lines.
HOWEVER, no matter where you place the arrow, this pointer is necessary to know where to position the printing plate on the newspaper each fourth dimension y'all impress. The arrow should always point to the centre of the paper each time it's printed. Doing this creates the symmetrical radial design. (More than on this below). They also wrote their proper noun and course in sharpie on the back somewhere as well.
Then the newspaper that was taped on gets taken off and thrown abroad and students were ready to print!
Solar day iii – Practise Press ON 12X12″ WHITE PAPER Commencement
After a press demonstration, students created a exercise print on white newspaper earlier moving onto their final copy (on their rainbow painting).
Students shared plates of black tempera paint and brayers and rolled out their brayer onto the plate of black paint a couple times. Since the pigment has a glace texture, it's of import to So scroll the brayer onto a sheet of scrap paper to get the paint evenly distributed onto the brayer. This also gets rid of any excess paint before rolling onto the printing plate.

So the brayer gets rolled onto the printing plate.


Once students evenly coated their printing plate with black tempera pigment, they carefully lifted it up and printed onto 12×12″ white 80# paper. Information technology's of import to have the press plates edges lined up with the papers edges and have the arrow pointing to the center of the paper.

Then students pressed down with the flat of their easily and and so used a Clean brayer, and rolled over the backside of their press plate all over to transfer the design to create the commencement print like below.


So, lifted it off to repeat those steps iii more times, rotating the printing plate so the pointer pointed towards the middle of their newspaper each time they printed.


DAY 4 – v FINAL Stride! Press ON THE RAINBOW PAINTING!
Students reviewed the printing procedure and continued to impress their design onto their rainbow painting that they painted on mean solar day ane!
Information technology was fun… but very messy!!!
This is why we drew a BIG arrow! So yous can encounter it!


Here's my YouTube Tutorial on the lesson below.
Cut Newspaper TREES


This was a fun, quick, one day lesson using merely structure paper, scissors and glue sticks!
TO VIEW MY Web log POST ON THIS LESSON WITH STEP-By Step PHOTOS TYPE IN "CUT PAPER Copse – 4Thursday GRADE" IN THE SEARCH BOX HERE.
I reviewed with students the complementary colors, symmetry and positive/negative space before demonstrating how to create these colorful fun copse.
Students then chose their two colored structure papers (one canvass pre-cut to ix×12″ and i sheet cutting to 6″x9″), and drew one-half of a tree forth the edge of their 6×9″ piece with pencil.
And then students cutting out their half tree.
Setting bated the cut tree, gum downward remaining newspaper onto one side of the 9×12″ sail.
Take the ane/two tree you lot start cut, and flip it over lining up the edges of the ii papers. Don't glue down this piece just even so!
Now depict some other half tree (or any 1/2 shape!) along the direct edge like below!
Cut out THAT half shape….
And flip that slice over…
Glue down the remaining ii cut pieces, so everything lines up at the tree top and tree stump's edges.
LEARNING GOALS:
Students can define complementary colors
Students can define symmetry and show this in their work
Students tin define positive and negative infinite and create that in their work
Lesson inspiration from LauraLee (@2art.chambers)
Initial Pattern with Analogous Colors (Sketchbook Covers)
For every grade level (1st-5th) I have students create a drawing that gets mounted onto a sketchbook for each pupil to utilize throughout the year. The sketchbooks stay in my art room in class level/ classroom bins. Each grade has a different drawing lesson and creates different artwork from other grades.
To create the actual sketchbooks, studentsfolded a sheet of 12×18″ 60# newspaper in half horizontally, for the embrace. Students then staple in 12 sheets of pre-cut 8.5 x11″ newspaper (donated extra long printer paper -viii.5 x 14″- Legal size- that I cut to 8.5 x 11″ alee of time). * Whatever left over cutting scraps of white newspaper are then used for other collages/lessons. Then their drawings get glued onto the cover.
Cracking for when kids cease early, plus information technology keeps all (what usually would be) loose exercise drawings all in one contained place. Students apply sketchbooks to gratis draw in once finished with an art lesson (if they cease early), also as to do drawing/programme out their ideas, earlier doing a final version.
Growing upward, I had sketchbooks and diary's that I would draw in and I call up it's so fun to be able to look back on something like that. My students will accept sketchbooks from 1st-fifth grade, a new one every year to exist able to look dorsum on and see /rail their own artistic growth throughout the years! Especially fun when you lot're older to dig upward all your old sketchbooks from your parents keepsake chest and flip through as an adult!
So, for this particular sketchbook comprehend drawing lesson, quaternary graders created a personalized cartoon using their initials.
Offset, students created a tracer (template) of their initials by drawing them in block letters on a small piece of manila tagboard and and then carefully cut them out as ane piece. I explained to students that the messages had to touch somewhere for this to piece of work. Students could describe their letters backwards, stack them on elevation of each other or have them next. To cut out smaller areas (like the triangles in the letter "A", or openings in the letter of the alphabet "O") they used a hole puncher to open information technology up before cut.
One time cut out every bit one piece, students were then challenged to create a dynamic design past tracing their templateat least 8 times without overlappingon a piece of 8×11 lxxx# paper. Students had the choice of drawing some initials coming off the page, every bit well as to create them stacked vertically, or side by side, and could trace them turned in any direction they wanted. We talked about how the letters appeared to be more than of a shape rather than letters when tracing, which students really loved! A couple down below look like they have faces!
Once outlined with blackness sharpie, students then created an interesting groundwork design using lines and/or shapes with pencil then colored in with ancoordinating color palette using mark. The letters were left white to pop against the background and be easily visible. Students overlapped colors together where needed to accomplish the desired color. Pieces of fleck paper were used to test out color combinations earlier coloring on their final drawing.
Sketchbooks are used throughout the yr to programme out ideas, work on an extension of the current lesson if finished early, experiment and have fun, and to practise drawing.
Learning Goals:
– Students develop a farther agreement of the colour wheel
– Tin can describe what analogous colors are and use them in their artwork
– Continue to develop skills on color blending / creating tertiary colors


Brute Drawings — (Foreground/ centre ground/ background)
In the outset of this art lesson, students expert drawing 3 animals in their sketchbooks, while looking at print out images of animals for reference.
Students learned drawing techniques on how to begin drawing the creature by breaking down the animal into elementaryshapes, like circles and ovals, to get the basic shape of the body.
They then selected 1 sketch to enlarge onto 12×eighteen″ paper and drew their chosen creature in either theforeground or middle ground within the animals natural habitat.
Students learned that objects in the foreground are drawn larger and lower on the page since they are the closest, objects in the center ground are drawn slightly smaller and in the middle of the page, and objects in the background are fatigued smallest and higher on the folio to show they are furthest away.
Students then colored in using colored pencils. Students learned that colors of distant objects (groundwork) appear muted and are less detailed, compared to the colors and details of objects closer to the viewer. To create this effect in their artwork, I demonstrated how to create value changes using colored pencils past either pressing downwards harder or lighter to create darker or lighter values, or students could use a lighter version of their colour to create the aforementioned effect.
Learning Goals:
– Students understand the definition of foreground, middle ground and background and tin place each area within artwork
– Acquire drawing techniques and demonstrate an agreement on how to break down images into basic shapes
-Demonstrate an understanding of size/space relationship and show this in their work
– Demonstrate an understanding of value inside artwork


Beast paintings
(Foreground/ eye footing/ background)
In the first of this art lesson, students practiced drawing three animals in their sketchbooks, while looking at impress out images of animals for reference.
Students learned cartoon techniques on how to begin drawing the animal by breaking downward the animate being into simple shapes, like circles and ovals, to get the basic shape of the trunk.
They then selected 1 sketch to enlarge onto 12×18″ watercolor paper and drew their chosen animal in either theforeground ormiddle ground within the animals natural habitat.
Students learned that objects in the foreground are drawn larger and lower on the page since they are the closest, objects in the middle ground are fatigued slightly smaller and in the eye of the folio, and objects in the groundwork are drawn smallest and higher on the page to testify they are furthest away.
One time the drawing was complete, students practiced painting techniques on scrap paper before using watercolors to paint their finished drawings.
Students learned that colors of distant objects announced muted and are less detailed, compared to the colors and details of objects closer to the viewer.
To create this consequence, they painted objects in the foreground with more paint than water on their brush in order to achieve adarker value with a more "opaque-like" finish. They then painted objects in thebackground with more than water than paint on their brush, in society to reach a lighter valuewith more than of a translucent finish.
Once finished paintings were completely dry, details were then added to areas in theforegroundwith colored pencils.
Learning Goals:
– Students understand the definition of foreground, heart basis and background and tin identify each area within artwork
– Learn drawing techniques and demonstrate an agreement on how to break downward images into bones shapes
– Learn painting techniques and demonstrate an agreement of value inside artwork


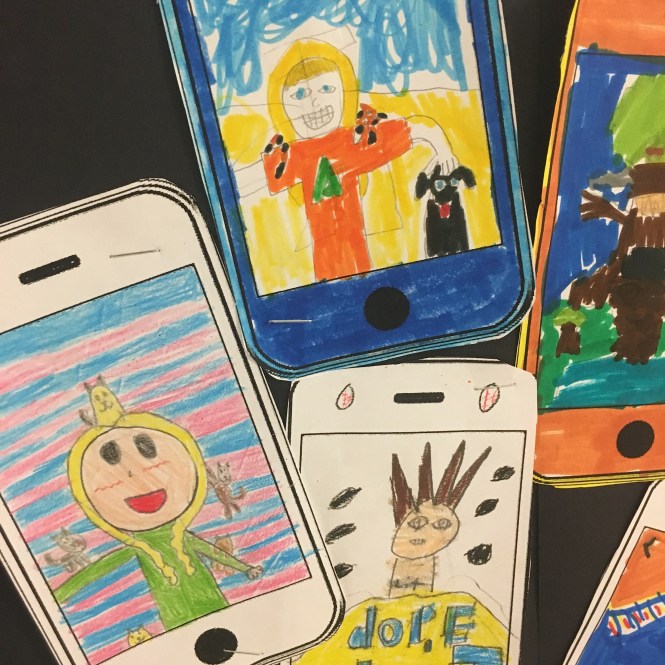
Believe in your Selfie

On the 2nd mean solar day of art class for all my 4th graders, students created a fun, quick self-portrait cartoon within a cell telephone. I establish the prototype in google images and so printed and fabricated photocopies. Students had the pick of coloring in with colored pencils, crayons and/or markers. Students loved this projection! Thanks Katy Hanson for the fun thought!!


robinsonhistithad.blogspot.com
Source: http://www.artwithmrsfilmore.com/4th-grade-art-lessons/
0 Response to "What Is the Style of Art of Various Cakes Wayne Thiebaud"
إرسال تعليق